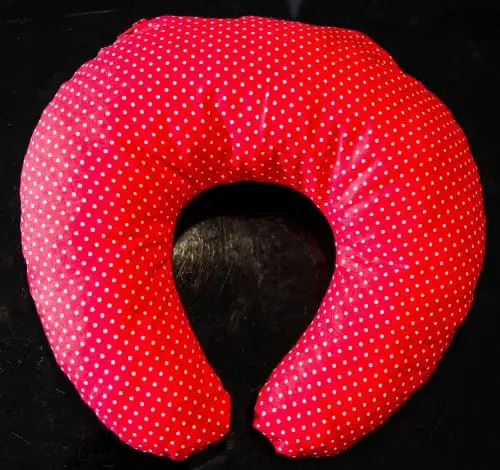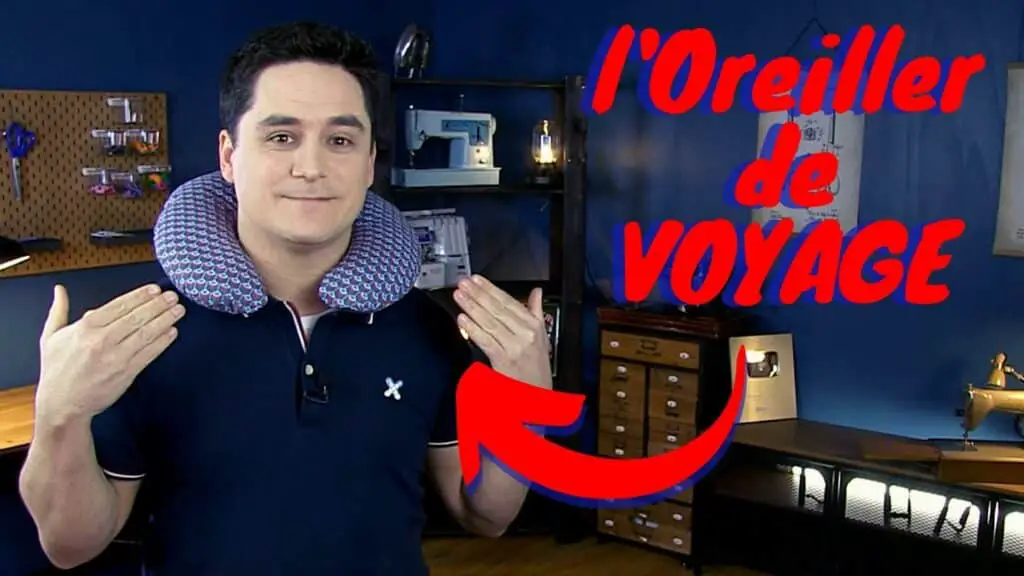
Travel Pillow (Child and Adult)
Going on vacation is always a fun time. At least for the kids! When you’re a parent, it’s a whole different kettle of fish!
I remember – when I was a kid – loving to go on vacation. But contrary to the adage that it’s not the destination that’s important, but the journey, personally I’ve always hated spending my day in a car or on a train.
So, to make long car or plane journeys pleasant for your children and/or yourself, why not make a travel pillow? As you’ll see, it’s very easy to sew!
The PDF File
To get the pattern for free, just enter your e-mail address below, and you’ll receive access to all the PDF patterns I offer on the blog:
You can also join the CoutureEnfant facebook group (and find all the free patterns in the “Files” tab).
The equipment
To sew this travel pillow, you will need :
- A sewing machine with a zipper presser foot. If you’re looking for a sewing machine, I had written this article.
- A 36 cm x 80 cm cotton coupon. You’re spoilt for choice when it comes to fabric! Organic cotton, or fleece if you want a soft pillow!
- A coupon of the same dimensions, for the inside. I use cotton voile or batiste fabric.
- A 20 cm zipper for the children’s version, 25 cm for the adult version. To save money, I recommend you choose a zipper by the meter.
- 40 grams of padding.
- And the usual sewing equipment: a pair of fabric scissors, a pair of embroidery scissors, small pins or clips, and good quality sewing thread.
The video tutorial :
Sewing the travel cushion
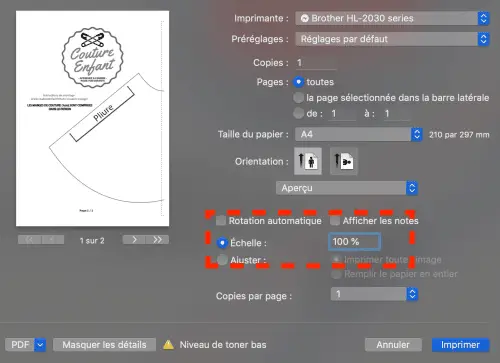
Start by [thrive_2step id=’2227′]downloading the PDF pattern[/thrive_2step], then print it out, taking care to keep the scale right!
To do this, your printer software must indicate “actual size” or “100% scale”.
Once you’ve printed the pattern, it’s time to assemble it.
Don’t worry, it won’t take long: there are only 2 sheets! Fold the left-hand side of sheet no. 2 over the dotted lines. Then hang the two papers together, placing a piece of tape on the lines to reinforce them.
You cut out the one and only pattern piece, using a pair of paper scissors.
No need to add seam allowances, they’re included.
Cutting the pillow fabric
Once you’ve decided which fabric you want to sew your travel pillow with, it’s time to cut it out!
We need to cut the pattern piece twice, in the fold!
Start by folding the fabric onto itself, paying attention to the straight edge. The pattern’s arrow must be parallel to the fabric’s straight edge.
Here’s a little image to help you spot the right thread on your fabric.
Place the pattern piece, aligning the fold of the fabric with the indication on the pattern, pin and cut all around.
WARNING, do not cut the “fold” side!
Repeat the operation to get the second piece of pattern in the fabric, and you’re ready to sew!
Sewing the zipper
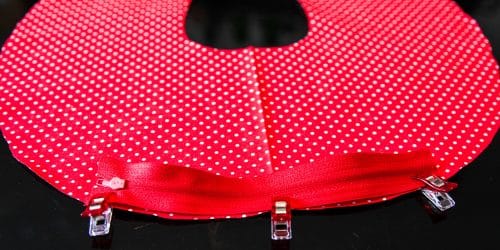
First of all, you need to attach the zipper to the pillow. Start by pinning the zipper to the top of the pillow. The fabric is right-side-up, while the zipper is wrong-side-up.
Be careful not to pull out the zipper slider! It’s not complicated to put it back on, but we’ve got better things to do!
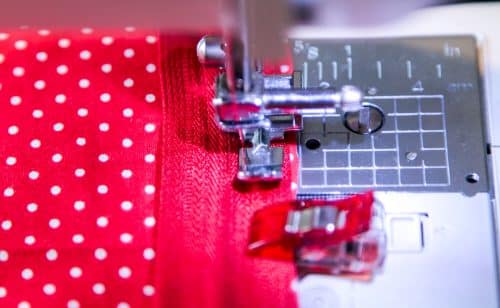
Install the special zipper presser foot on your sewing machine, and stitch along the teeth, starting and ending with a stop stitch.
If you’ve never tried a zipper before, I’d like to refer you to this video tutorial I shot.
Once you’ve sewn one side of the fastener, we’ll take care of the other!
Again: position the second piece of cushion on the zip, pin, and machine as before.
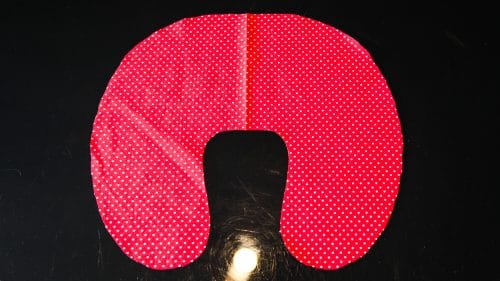
You now have the two pillow pieces connected by the zipper!

Pillow stitching
Now place the two parts of the cushion right sides together. Align and pin all around.
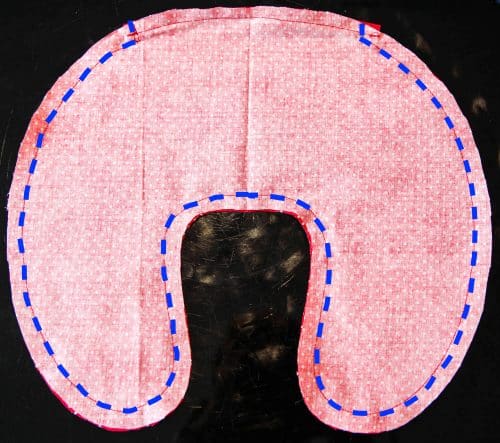
Then, on the sewing machine with the standard presser foot, we’ll sew all the way around the cushion, 1 cm from the edge.
First, we need to secure the zipper. We’ll sew over it, perpendicularly, so as to trap the zipper in the fabric.
Then sew all along the cushion. Have you been lacking practice in sewing curves? Now’s your chance!
When you reach the other side, again sew at 90° to the zipper to lock the slider in place.
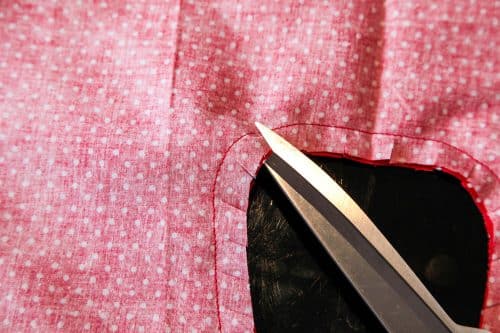
Now it’s time to notch the rounded edges, i.e. make a notch in the seam allowance at regular intervals. Allow about 3 or 4 centimetres along the entire length. Then, when you turn the pillow right side out, the curves will be perfect!
Now’s the time to turn the cushion inside out! Simply use the zip opening to do so.
Using a knitting needle or chopstick, you push the curves together to give your project a beautiful shape.
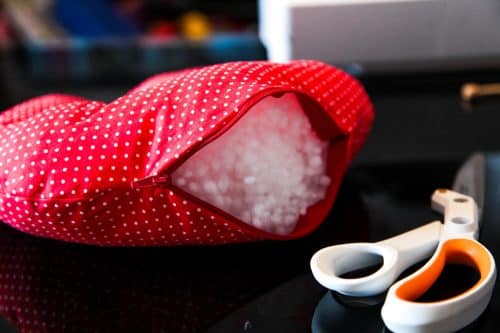
All that’s left to do is stuff the pillow with absorbent cotton, close the zip, and give a child your pillow!
Well done for this sewing tutorial!