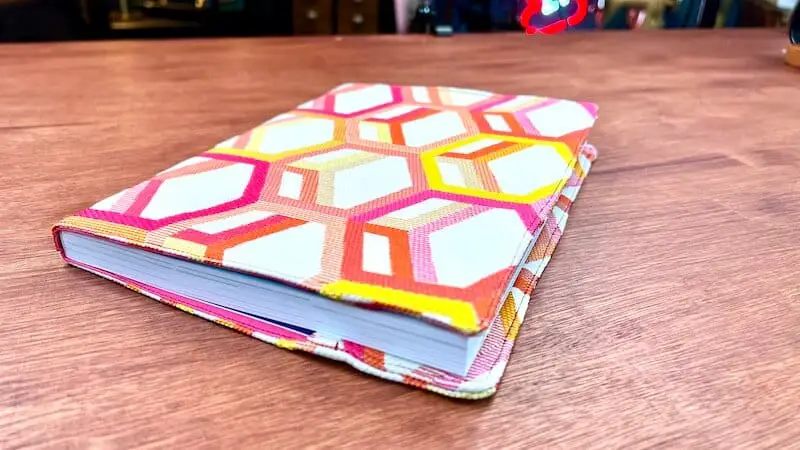
Sewing a book cover
Protect your favorite books in style by sewing a fabric book cover! In this article, we’ll take you step-by-step through the process of creating a personalized accessory that combines practicality and aesthetic appeal.
Whether you’re a beginner or an experienced seamstress, let yourself be inspired by this creative project that will delight lovers of reading and needlework.
What you need
The first thing to do is to take the measurements of the book (or notebook) for which you want to sew a protective cover. We need the dimensions of the book, as well as the width of the spine.
In my case, the book is 17.5 cm wide by 24 cm high. And the edge is 1.5 cm.
- I add 2 times the width of the book and the edge, and add 3 cm. In my case, the calculation is 17.5 + 17.5 + 1.5 + 3 = 39.5 cm.
- For the height, you simply add 3 cm to the height of the book. For my book: 24 + 3 = 27 cm.
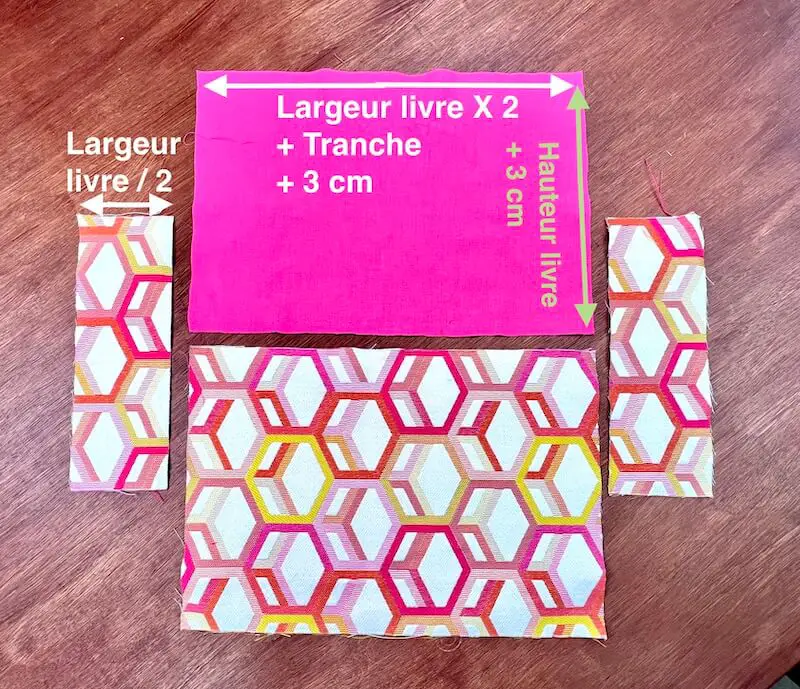
We’re now going to cut 2 rectangles with these measurements: (W)39.5 cm X (H)27 cm. The 1st rectangle will be on the outside (choose a slightly thick fabric like jacquard, or cotton that you’ll reinforce with iron-on). The 2nd rectangle will be on the inside, and a simple cotton fabric will do just fine.
We’ll also need to cut 2 rectangles from the outer fabric, to act as flaps for the cover and spine. The height of the flaps is calculated in the same way as the 1st rectangle: book height + 3 cm. In my case: 24 + 3 = 27 cm.
For the width of the flap rectangle, simply divide the width of the book by 2. In my case, 17.5 ÷ 2 = 8.75 cm. You can round up = 9cm.
By the way, if you’d like to sew a health book cover, there are 2 tutorials with PDF patterns available here, and here 🙂
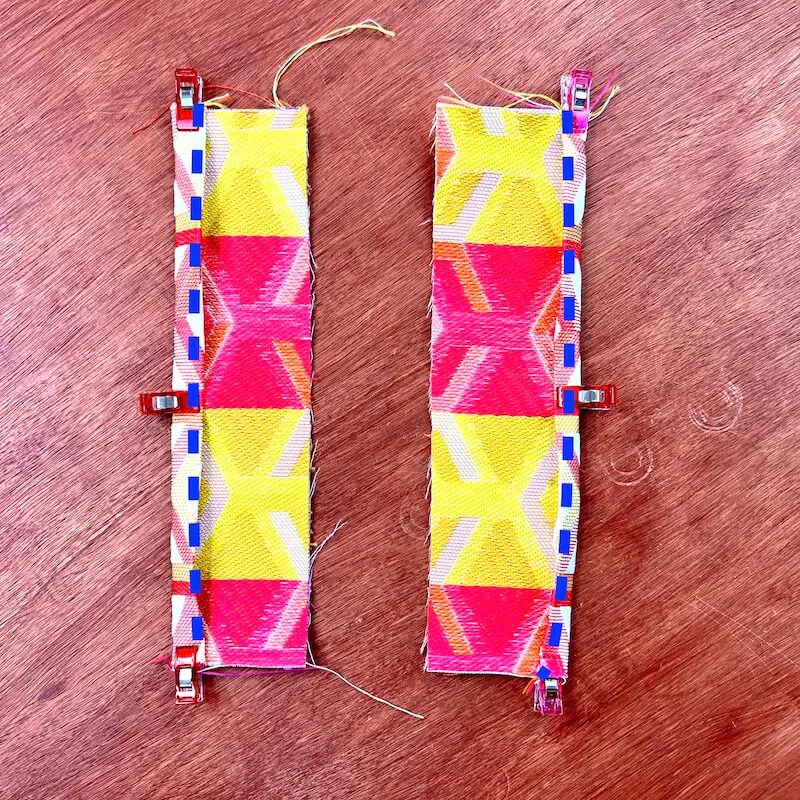
Preparing flaps
First and foremost, it’s important to understand that one flap goes on the left, the other on the right. This is particularly important if the fabric you’re using has a pattern that won’t stand up to being turned inside out.
Start by placing the 2 reverse flaps facing each other. Then fold over one of the long sides by 1 cm. Use an iron to mark the fold, then fold another 1 cm. Pin and stitch as close as possible to the edge of the first fold, using a straight stitch.
Assembling the book cover
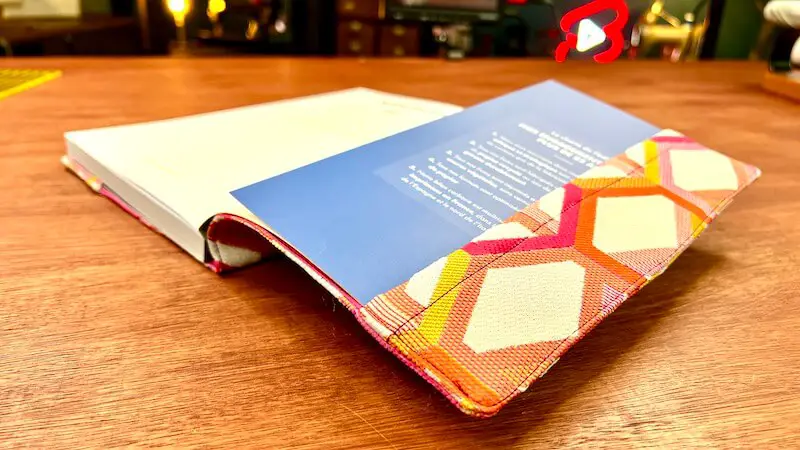
Now position the flaps on either side of the outer fabric rectangle, right sides together. Align the edges.
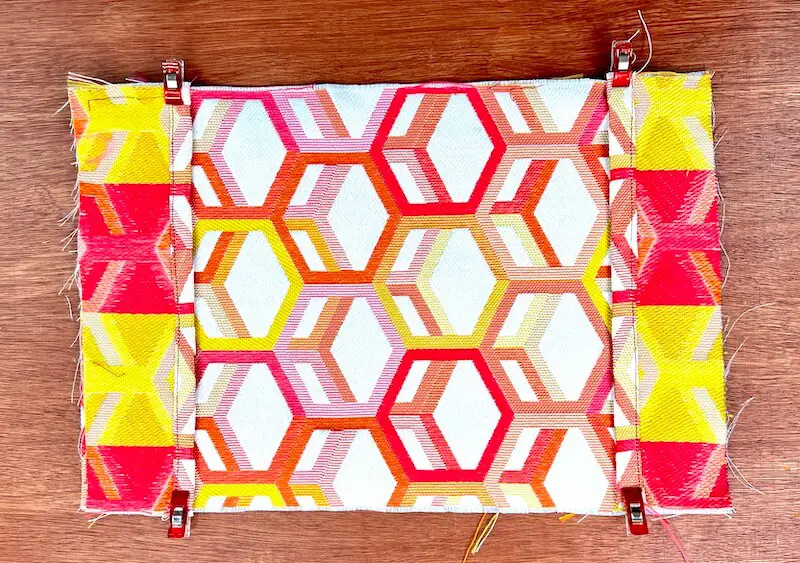
And on top, right sides together, we place the lining rectangle.
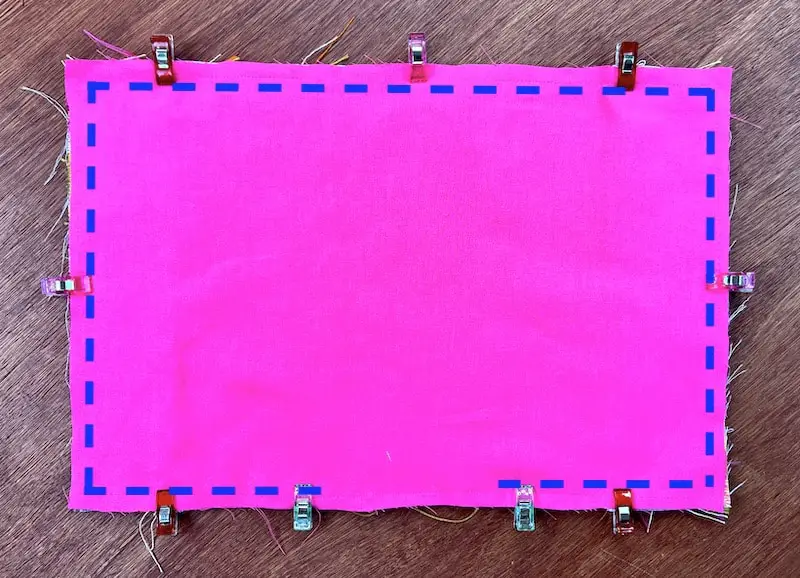
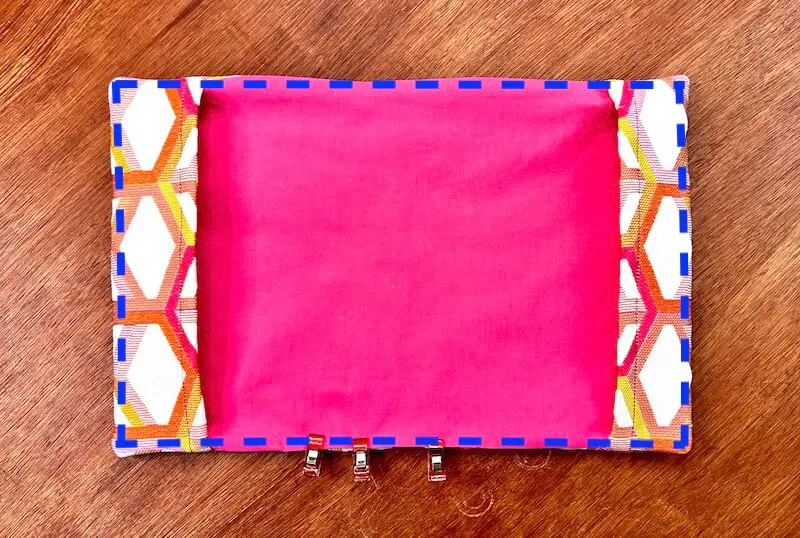
We’ll sew 1 cm from the edge, using a straight stitch, leaving an opening at the bottom of the book cover.
The corners are then trimmed by removing the seam allowances and cutting them at 45°.
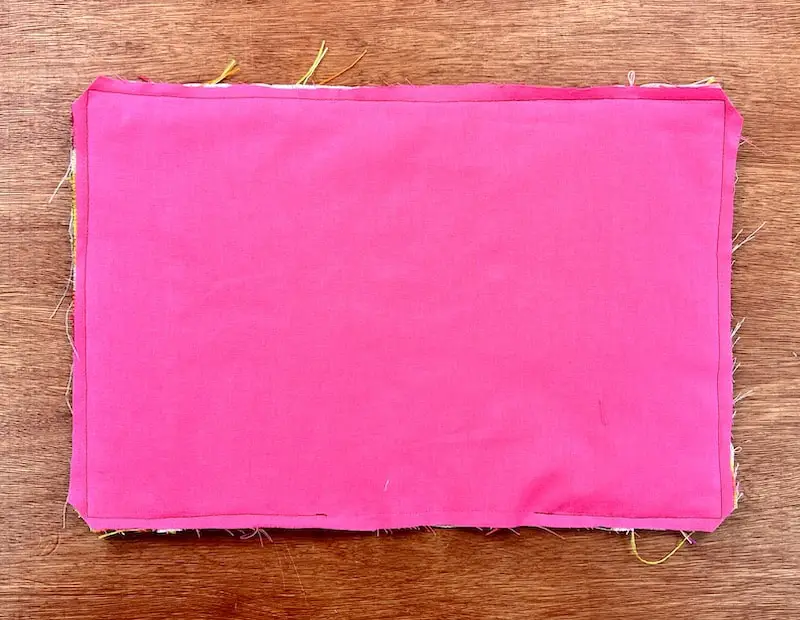
And through the opening we’ve left, we turn the whole thing right side out. Using a small tool, or simply a knitting needle or chopstick, you push the corners together to give them a nice shape. An ironing stroke is a good idea, too.
Next, we’ll tuck in the seam allowances of the opening we’ve left. And stitch all around, as close as possible to the edge of the book cover.
Your book cover is now finished, congratulations!