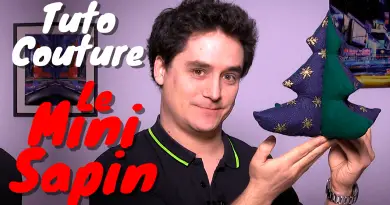

The Christmas Tree Pochon
This little pouch in the shape of a Christmas tree is the perfect sewing kit for the festive season!
Quick and easy to sew, it can be used as reusable gift wrapping, table decoration or even as a mini Advent calendar.
The step-by-step video is at the end of this article.
The PDF
To get the free pattern, just enter your e-mail address below, and you’ll receive access to all the PDF patterns I offer on the blog:
You can also join the CoutureEnfant facebook group (and find all the free patterns in the “Files” tab).
Sewing equipment
To sew this Christmas tree pouch, you will need :
- 1 outdoor poplin or cretonne coupon, (H) 30 cm X (W) 40 cm.
- 1 poplin or cretonne coupon for lining, (H) 30 cm X (W) 40 cm.
- 1 rectangle of poplin or cretonne for the tree trunk, (H) 8 cm X (L) 9 cm.
- About 10 grams of wadding (you can also choose to use shavings from fabric scraps, or nothing at all!).
- 100 cm of 6mm to 10 mm ribbon or cord.
and your usual sewing equipment!

Cutting the pattern
Once you’ve downloaded and printed the PDF pattern, you’ll need to cut out the 2 pieces: the main part of the Christmas Rabbit Bag, and the Trunk. You cut along the lines of the pattern, and the seam allowances are already included, so there’s no need to add anything!

Cutting the fabric
We need to cut the main piece twice, once from the outer fabric, the second from the lining fabric. And we’re going to cut these pieces the same way: we fold our fabric over on itself, and place the main piece, matching the side marked “fold” with the fabric fold. We pin all around and cut with our fabric scissors all sides except the folded side.


The trunk piece is simpler to cut: simply place the pattern piece directly on the fabric, pin it and cut around it.

Assembling the Christmas Tree Pochon
We start this tutorial by placing the main piece in the outer fabric, right sides together, and over that, we place the same piece in the lining fabric, right sides together.
Using a sewing machine, we stitch the top of the pouch with a straight stitch.

Next, we open the 2 seams we’ve just made, using an iron. We spread the seam margins with our fingers and give the iron a gentle stroke to keep the margins open.
Sewing the trunk
Start by folding the trunk piece onto itself (pay attention to the direction – it’s a rectangle, not a square). Using a sewing machine, stitch the 2 short sides together.

Then turn the trunk right side out, and stuff it with batting.
And, on the sewing machine, we stitch the top opening to within 0.5 cm of the edge.

Finally, the trunk piece is placed in the center of one side of the pouch, right side out.
Stitch the trunk onto the pouch in straight stitch, again 0.5 cm from the edge.

Sewing the pouch
Place the pouch piece with the trunk, right side up. Then, on top, right sides together, you place the other piece of the pouch.
Align the edges, corners and center seam, and stitch all around the pouch, 1 centimeter from the edge.
BUT, we’re going to leave an opening of about a quarter of an inch in the middle of the lining.
We’ll also need to leave 2 openings on the outside for the ribbon. These openings should be 2 centimetres wide. Use the edge of the outside seam allowance you folded down earlier as a reference.

Remove the excess seam allowances in the corners, and through the opening left in the bottom of the lining, turn the pouch right side out.
Then we give it a nice shape by pushing back the corners and seams.
Finally, close the opening in the sore by straight-stitching along the entire length of the opening.

We now tuck the lining inside the pouch into the outer fabric.
Sewing the runner
Make sure the outer fabric is on the outside, the lining is on the inside and the center seam is … in the center!
Next, we’ll sew 2 topstitches 1 cm from the edge and 3 cm apart. These 2 seams will allow us to attach the drawstrings.
Rape bag ties
Using a safety pin, we prick the end of the ribbon and thread it through the slider. The ribbon is pulled in on one side, and comes out on the same side after going around the opening of the pouch.

Repeat with the second ribbon, tie knots at the ends and you’re done!