
What types of sewing to choose? Techniques and tips
When you start sewing, you quickly discover that there are many different types of sewing.
There’s more to the techniques than simply joining two fabrics: each method has its own name, its own uses and its own advantages.
Sewing actually combines two main stages: assembly and finishing. Depending on whether you’re making a garment or an accessory, working with thin, thick or stretch fabrics, or looking for a particular finish, the type of sewing you choose will make all the difference.
For these sewing techniques, you need a sewing machine, an iron and, optionally, a serger.
Assembly seams: the basis for sewing parts together
Open seam assembly
It’s the most common and easiest to assemble. It’s usually the first technique you learn in sewing.
It couldn’t be simpler. Simply place the two pieces of fabric right-side-up, edge-to-edge on the side to be sewn.
Next, stitch at a distance from the edge. This distance is determined by the seam allowance of your project. Finally, you need to press the two edges of the fabric apart so as to “open the seam” to obtain your open seam assembly. Although these are often 1 cm apart, this is not always the case. It’s best to check the information in the tuto/pattern you’re making.

Recumbent sewing
This sewing technique is performed in the same way as an open seam assembly, but differs in the way it is ironed. In this case, the seam value must not be open, but lying towards the indicated side.
To avoid creases, the best method is to lay the wrong side of the fabric against the ironing board and press the margin in the desired direction. Once done, iron at the seam so as to push the fabric towards the lying seam value.

Veneer seams
Plating is a type of stitching used in very specific cases, such as the back pockets of jeans.
Unlike conventional sewing, the fabrics are not edge-to-edge. Here, one piece (e.g. the pocket) is placed in the middle of another (e.g. the leg) and stitched around to hold them together.
It’s also a technique that can be used to sew piping, slides, appliqués, etc.

Sliding
This technique involves assembling two identical elements in order to turn them inside out (such as a pocket flap or scallops). Simply stitch the two fabrics right sides together and turn them inside out. With a little ironing in between to open the seams on the inside, your finishing touches will be all the better.

French seam (ideal for fine fabrics)
This is a very specific technique used by professionals or on delicate fabrics. The French seam, by virtue of its construction, makes it possible to hide the unsightly, often fraying edge of the fabric in the seam itself.
- To make it, you need to make an open-seam assembly, but this time place the fabrics wrong sides together, not right sides together.
- Sew the first stitch (often between 3 mm and 6 mm).
- Press the seam open with your iron. Then close it by placing the fabric right sides together.
- You can now make the second stitch (wider than the first).
- And finally, it needs to be put to bed.
The edge of your fabric ends up in the “tube” formed by your two seams, giving you a seam with a high-end finish.
You’ll find a video tutorial right here. And our dedicated article here.

Folded seam (strong and resistant)
Folded seam is a solid technique that requires two stitches, which gives it its strength. It also hides the edge of the fabric on the inside, as French seam does.
- To make it, you need to place your two fabrics right sides together, but not edge-to-edge. In fact, the fabric on top must be offset so that you can see the fabric underneath (the offset value is always specified in your tutorials).
- You can then stitch the two elements at an even distance to hold them together.
- Using the iron, you can then fold the most protruding fabric over the other.
- Finally, fold these seam values over so that they run along the fabric.
- To finish, simply stitch at the edge of the fold formed by the seam values, using the outer fabric.
Your sewing is finished. Watch the video tutorial here.

Overlocking (assembly using a serger)
Overlocking is not the same as overlocking, which is discussed below.
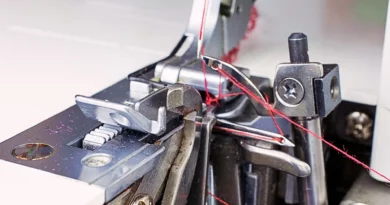
To carry out this type of work, you need a serger. Overlocking necessarily involves joining two or more fabrics together. Simply place the two pieces of fabric right sides together, edge to edge, and feed them through the machine so that they are held together by this stitch.

Sewing finishing techniques for a clean, durable finish
Overlocking for clean fabric edges
This operation can be performed either on a sewing machine with a Zig-Zag stitch, or on a shaving serger. The aim is to trap the edge of the fabric with the thread to prevent it from fraying.
This operation is not intended to join the elements together, but to finish their edges.
- In the case of open seam assembly, the two elements must be surfaced before assembly.
- In the case of a lying seam, you need to surface-finish your seam after assembly and before ironing.
⚠️ Don’t try to overcast your open seams after assembly, especially if you’re using a serger. This is the best way to avoid going straight, or even cutting your fabric!

Topstitching
This type of stitching has a decorative purpose. It’s a visible stitch on the right side that serves to structure the garment or accessory. It is often done at a distance from an assembly, and sometimes in duplicate, as on denim jackets, for example.
For fabrics that cannot be ironed, it is impossible to open or lay down the seams permanently. In this case, topstitching becomes functional, keeping seams in the desired direction.
Under-stitching” doesn’t officially exist. It’s a vulgarized term to tell you to topstitch pieces that are on the inside of the garment so that they don’t show on the top.

Filled (often with overlocking)
Need to finish the bottom of a leg, sleeve or coat? Filling can be the solution.
This involves folding the fabric just once (using an iron). You can then stitch along the edge of the fabric to hold it in place. This filled fabric can be surfaced before stitching to prevent it from fraying inside your garment. It is mostly used for thick fabrics.

Hemming (normal or invisible)
A simple hem is basically the same as a filled hem, but this time the fabric is folded twice before stitching. The result is a clean edge without overcasting. It can be used on thin and medium-weight fabrics. For thicker fabrics, fillers are preferred to avoid thickening.
The invisible hem is the exception that proves the rule… The fabric is folded only once. And the edge is often surfaced. You can then sew the inner part to the outer part using a small hand stitch.
See a video here, and our dedicated article here.

Edging (with bias or braid)
Edging is the finishing technique used to cover the edge of a fabric.
It consists in laying a strip like a bias (a strip of fabric cut diagonally across the fabric, often folded in 4), in a single step, with the fabric sandwiched inside this strip. It requires a great deal of dexterity and/or specific tools to successfully sew the bias on both the top and bottom of the fabric in a single stitch.

However, bias binding can also be applied in two stages. First, by gathering (assembling) the right side of the bias against the wrong side of the fabric, stitching in the first fold. Then, by folding over the bias to the right side of the fabric, stitching to the edge of the fabric to hold it in place.
Video here: Sewing bias with the special foot.
And to do it in two steps, click here: Bordering: sewing bias, the easy way

How do we choose the right type of sewing for our project and fabric?
The choice of a sewing type depends on several key factors:
- The fabric used, the purpose of the project and the desired end result. Some techniques, such as French seam, are better suited to thin or transparent fabrics, while others, such as folded seams, are ideal for thicker fabrics, and overlocking is ideal for stretch fabrics.
- It’s also important to consider the purpose of your sewing. Does your fabric only need to be assembled, or does it also need to be very strong? Or do you need a beautiful finish? For example, a bread bag doesn’t necessarily need to be finished to a high standard, but you can work it into a coat.
- And finally, the type of sewing you use depends on your skill level. If you’re just starting out, French seam may be too ambitious for your first projects.
By combining the criteria of fabric, use and desired level of finish, you can choose the right type of sewing.
Are you just starting out and find it too complicated to choose? Don’t worry, it’s usually all spelled out in the sewing patterns and related tutorials.
FAQ about sewing types :
- I’m just starting out, which sewing should I choose?
- Favour open and lying seams.
- As well as hems.
- Should I hem or fill?
- If the fabric is very thick, fill it to avoid thickness under the machine and improve visual appearance.
- For thin fabrics, use hems.
- Do I need to topstitch?
- Yes and no. Do you want to? If so, get out your best yarn (contrasting or not) and go for it.
- Are your seams not holding properly despite ironing? Topstitch.
- Which is the strongest seam?
- The folded seam has the advantage of two stitches and holds the fabric firmly in place.
- French seam, because it’s also done with two stitches and prevents fabrics from fraying.
- What’s the difference between French and folded seams?
- French seam is designed for fine fabrics, and the first seam is edge-to-edge. No stitching is visible on the right side of the fabric.
- Folded seams are preferable for thick fabrics. Fabrics are not edge-to-edge when first joined, and folding over later reveals a stitch on the right side of the fabric.
Test several techniques and find the one that’s right for your project! Whether you’re working on a garment, an accessory or a creative project, experimenting with different seams will help you achieve both aesthetic appeal and optimum strength.
Feel free to experiment and adapt techniques to your fabrics to find the sewing style that suits you best.